
HITL Analytics · Beginner tutorial
How to use Truvyx HITL Analytics to improve human-agent workflows
Human review is not just an approval step. Every approval, edit, rejection, timeout, and override is evidence about how well an agent’s proposal fits the reviewer’s context, policy, and expectations. HITL Analytics turns that evidence into friction metrics, recurring patterns, and concrete corrections.
HITL Analytics measures friction, not human performance
A high edit rate may mean the agent is poor—or that the proposed action is useful but needs a reviewer’s final adjustment. A high rejection rate may reveal a constraint gap, incomplete context, policy misunderstanding, or an intentionally cautious reviewer. Read the metrics as signals for system improvement, not as a scorecard for individual humans.
Before you begin: capture outcome data
The dashboard is populated by real escalation outcomes. Add the HITLWidget to an approval interface or generate a standalone review portal link through the SDK. The reviewer can approve, approve with edits, or reject with a category and reason.
Each outcome can include the evaluation run, agent, escalation tier, timestamps, response latency, corrections, rejection category, and override justification. That context is what makes aggregate friction useful.
Escalation policies live in the Constraint Engine. The resulting decisions can be evaluated from an Evaluation Run before the human outcome is analysed.
Step 1: open HITL Analytics and choose a time window
Open HITL Analytics from the dashboard. The top-right selector changes the lookback window to the last 7, 30, or 90 days. Use a short window when investigating a recent prompt or model change; use 90 days when looking for a stable pattern.
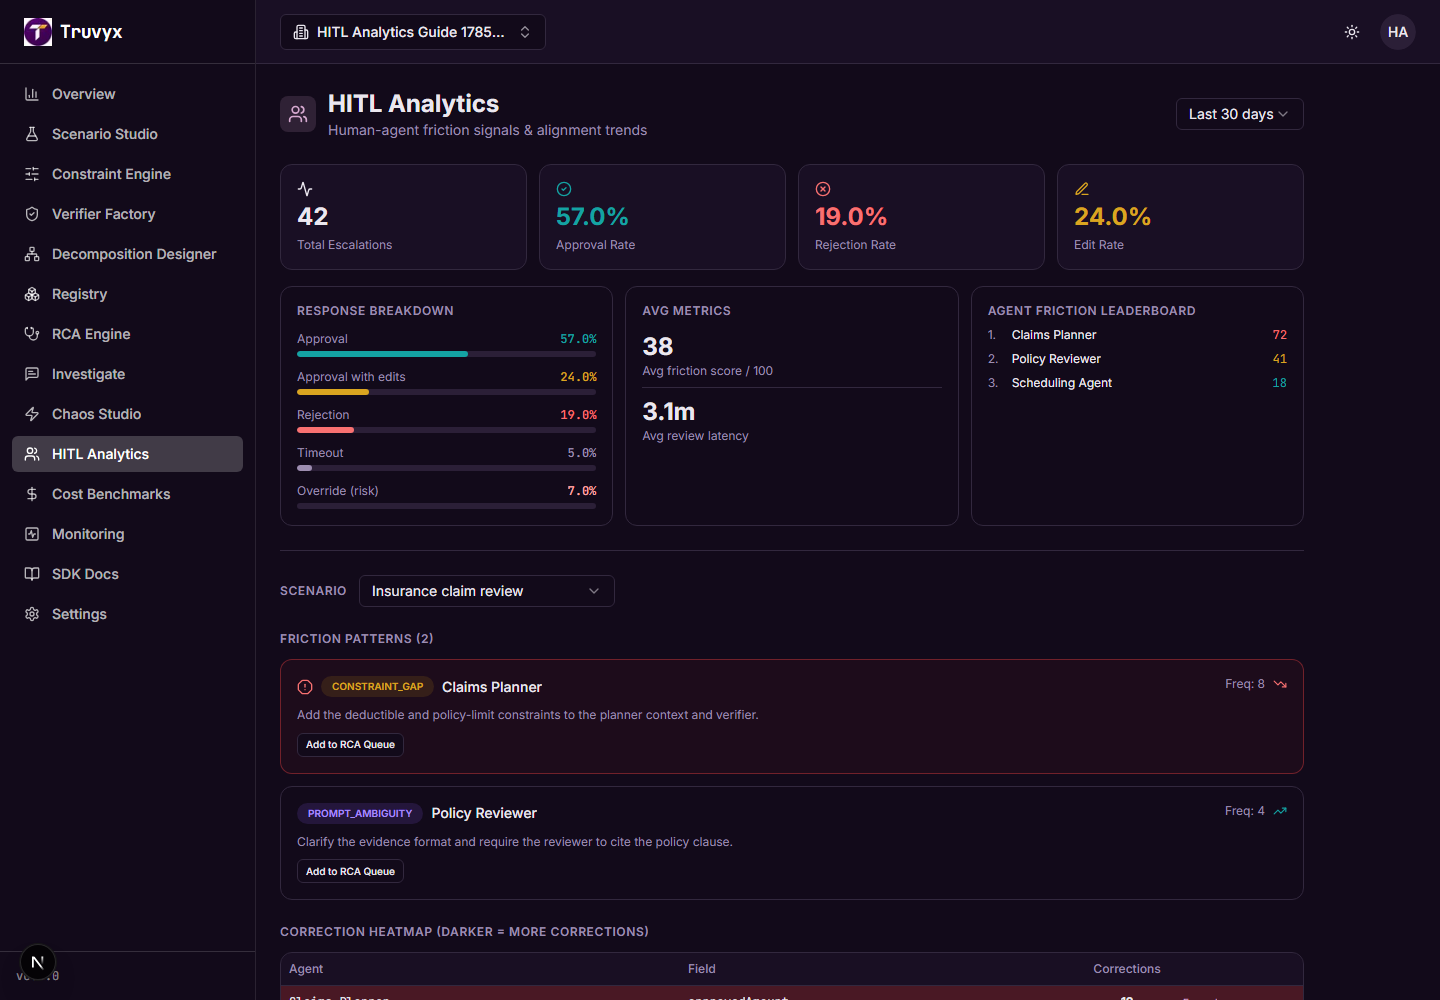
The organisation overview contains four headline cards:
- Total Escalations: the number of recorded human-review outcomes in the window.
- Approval Rate: outcomes approved without rejection.
- Rejection Rate: outcomes rejected by the reviewer.
- Edit Rate: outcomes approved after the reviewer corrected fields.
Step 2: read the response breakdown and average metrics
The Response Breakdown visualises approval, approval with edits, rejection, timeout, and override risk. An override is a particularly important signal because a human or system bypassed the ordinary decision path; inspect its justification and surrounding policy.
Avg Metrics shows the average friction score and review latency. Friction incorporates the response type, correction count, and rejection category. Latency shows how long the human loop takes from escalation to response. A low-friction system can still be operationally slow if reviewers wait in a queue.
Compare the rates with service goals. For a high-risk decision, a small increase in latency may be acceptable if it prevents unsafe autonomy. For a high-volume low-risk workflow, repeated edits may be more expensive than a slightly slower model that proposes cleaner actions.
Step 3: use the agent friction leaderboard carefully
The Agent Friction Leaderboard ranks agents by average friction and shows the number of outcomes behind each value. Use the count as a confidence check: an agent with a friction score of 80 from two reviews needs more evidence than one with a score of 55 from fifty reviews.
A high-ranking agent is a place to investigate, not an automatic candidate for removal. Open the underlying runs, review the proposed actions, and ask whether the issue comes from missing context, constraint gaps, ambiguous prompts, bad data, or architecture.
Step 4: select a scenario for pattern analysis
Below the organisation overview, choose a scenario. The scenario selector controls the Friction Patterns and Correction Heatmap sections. If no scenario appears, create one in Scenario Studio and capture human outcomes against it.
Patterns require at least three matching outcomes in the selected lookback window. An empty feed does not prove that the workflow is frictionless; it may simply mean there is not enough data yet.
Patterns are labelled with signals such as Constraint Gap, Prompt Ambiguity, Few-Shot Needed, Data Quality Issue, Decomposition Fault, Architectural Change, or Acceptable Variance. Each includes an affected agent, frequency, trend, recommended action, and sometimes an override-risk marker.
Step 5: interpret friction patterns and send them to RCA
A pattern marked DEGRADING means the signal is getting worse across the comparison period; IMPROVING means it is moving in the better direction; STABLE means there is no meaningful trend.
Override-risk patterns deserve early attention. They suggest the normal escalation or approval behaviour may be bypassed in a way that could undermine governance. Click Add to RCA Queue to open RCA with the affected agent as context. RCA can then connect the human signal to run violations, fault events, and counterfactual repairs.
Example: if reviewers repeatedly reject a planner’s approved amount because the deductible is missing from context, the signal may be a Constraint Gap. Add the deductible to the scenario and agent contract, encode it in the Verifier Factory, and rerun the workflow.
Step 6: read the correction heatmap
The heatmap groups corrections by agent and field. Darker cells mean more corrections. Each row shows the agent, field, correction count, and an Examples action.
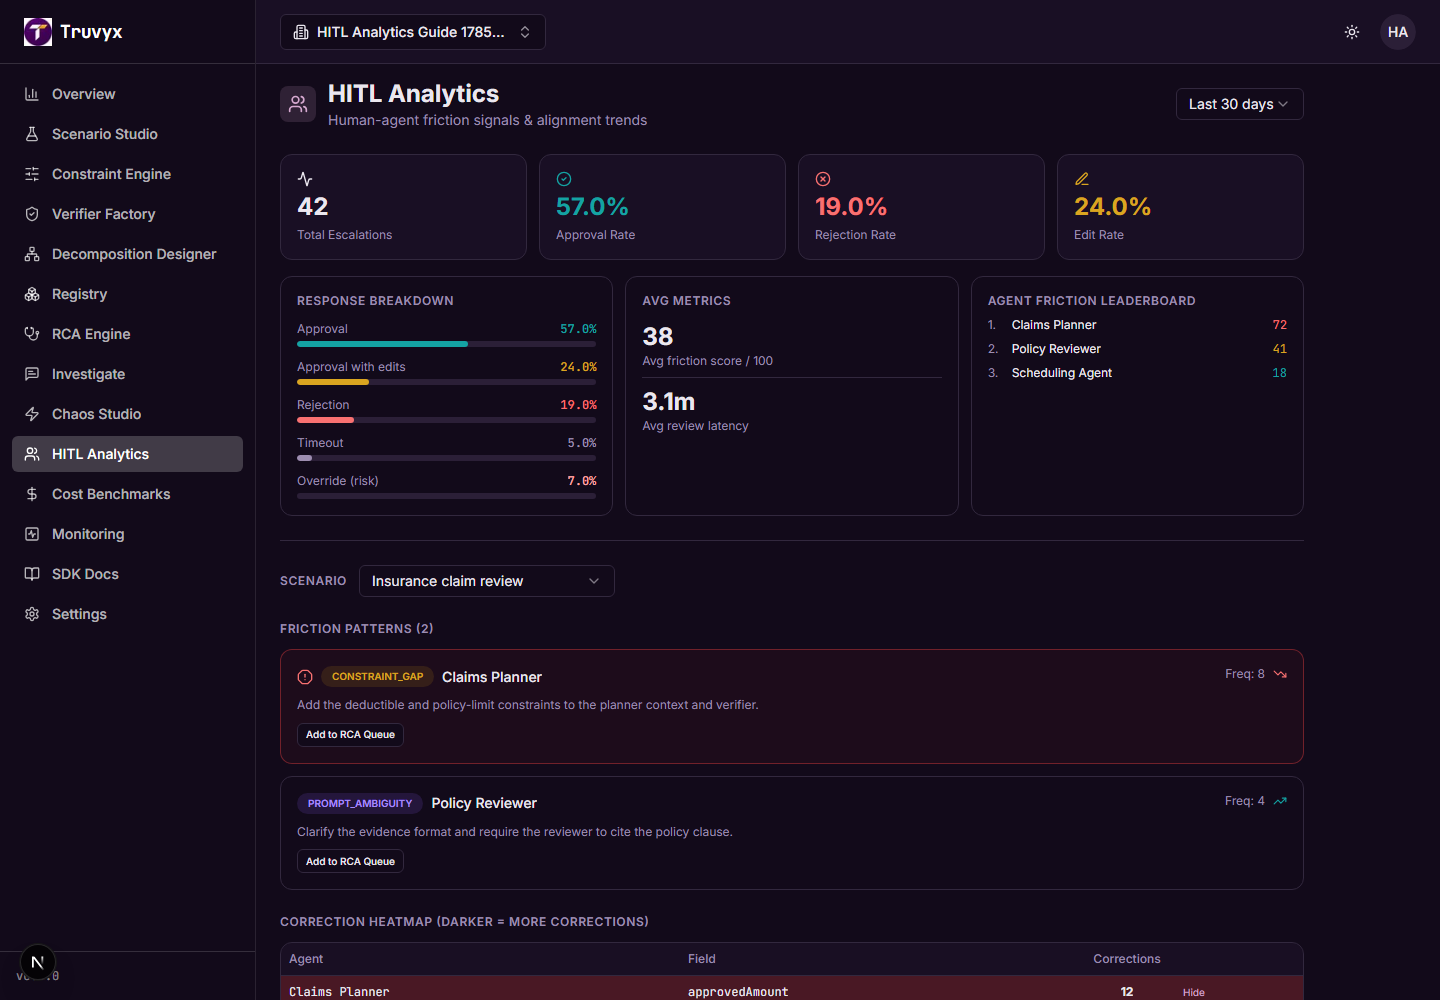
Click Examples to open the original and corrected values. Look for repeated meaning:
- Numbers repeatedly lowered may indicate an overly aggressive optimisation target.
- Missing evidence fields may indicate incomplete context or an unclear output contract.
- Repeated policy-category corrections may indicate a constraint or retrieval problem.
- Formatting corrections may be harmless presentation friction rather than a model-quality defect.
Use examples to form a testable hypothesis, then create a scenario or verifier check. Do not train the system on a correction until you understand why the human made it.
Step 7: use the HITL widget and portal deliberately
The embedded widget displays the agent, decision ID, proposed action, and review status. The reviewer can expand Raw JSON to inspect the full action. The normal actions are Approve, Approve with Edits, and Reject.
Approve with Edits opens a correction tracker where the reviewer records field, original value, and corrected value before submitting. Reject requires a category and reason. The widget records the response and shows a completed confirmation rather than allowing accidental duplicate review.
For reviewers outside the product, generate a standalone portal link with an expiry. Treat the token as sensitive: it grants access to the decision review surface and should be sent only to the intended reviewer.
How HITL Analytics connects to the platform
- Constraint Engine: defines escalation tiers, required context, reversibility, and policy triggers.
- Evaluation Runs: supplies the agent output and run context used to evaluate escalation decisions.
- RCA Engine: investigates recurring friction, false autonomy, and architectural signals.
- Verifier Factory: turns repeated human corrections into executable checks.
- Investigate: provides a grounded conversational way to ask how often a friction pattern occurs.
- Monitoring: watches whether the correction or escalation pattern improves after a change.
A safe first analysis
- Embed the widget in one approval workflow.
- Capture at least three outcomes for one scenario.
- Review the approval, edit, rejection, timeout, and latency rates.
- Select the scenario and inspect friction patterns.
- Open the highest-frequency heatmap cell and compare original versus corrected values.
- Send one recurring pattern to RCA.
- Turn the confirmed root cause into a scenario, constraint, verifier, or prompt change, then measure the next window.
Continue the workflow
When a correction suggests missing rules or unsafe autonomy, return to the Constraint Engine guide and update the evaluation contract.