
Registry · Beginner tutorial
How to use the Truvyx Registry
The Registry is where evaluation scenarios become reusable benchmarks. This guide assumes you have never worked with an evaluation catalog before and walks through finding a scenario, reading its evidence, downloading it, reusing it in Scenario Studio, and contributing your own.
First, understand what is being shared
A Registry entry is a published scenario, not a model and not a leaderboard claim by itself. It describes the task, agent roles, constraints, feasibility evidence, version, and community results. You bring your own agent system, run it against the same scenario, and submit the resulting run when you want a comparable score.
Step 1: open the Registry
Choose Registry in the dashboard. The page starts with a count of validated scenarios and domains, then divides into a filter column and a results grid. If you are following along locally, open Registry.
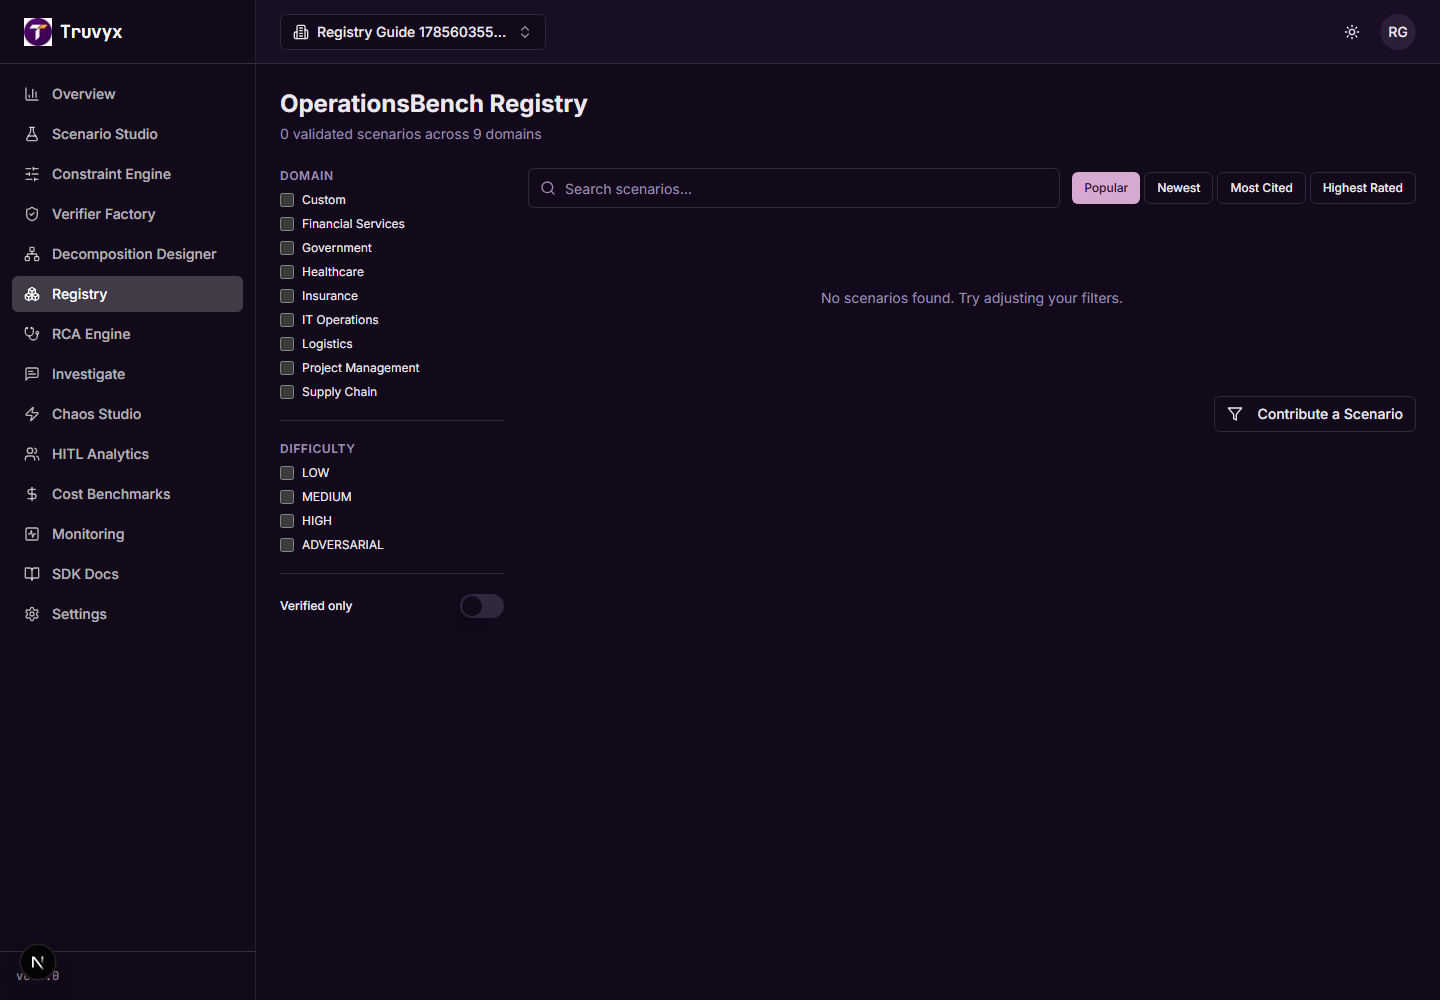
Each card gives you a quick orientation: scenario name, version, description, domain, difficulty, agent count, constraint count, score when available, citations, upvotes, and a download icon. This is enough to shortlist candidates; open the card before treating it as a benchmark you understand.
Step 2: search and narrow the catalog
Use Search scenarios… for a phrase from the name, description, or tags. Search waits briefly while you type and uses the Registry’s full-text search. For example, searching for incident response is more useful than searching for a vague word such as AI.
The left side lets you select a domain such as IT Operations, Healthcare, Logistics, or Financial Services. You can also filter by difficulty: Low, Medium, High, or Adversarial. Turn on Verified only when you need entries with a feasible scenario and a generated problem statement.
Finally, use the sort controls:
- Popular: highest community activity.
- Newest: recently published entries.
- Most Cited: entries used by more downstream work.
- Highest Rated: entries with the strongest upvote signal.
These signals answer different questions. “Most cited” does not mean “best for your use case”; it means other people have referenced it more often.
Step 3: read an entry before downloading it
Click a scenario name. The detail page gives you five tabs. Start with the header: it shows the domain, difficulty, number of agents, version, downloads, citations, upvotes, and passed evaluation runs.
- Overview: read the purpose, agent roles, tags, feasibility status, and ground-truth signal.
- Problem Statement: learn exactly what an agent system is expected to solve.
- Constraints: inspect the rules, categories, natural-language descriptions, and whether each is hard or soft.
- Leaderboard: compare systems across feasibility, completeness, optimality, and overall score.
- Citation: copy BibTeX or APA metadata and record the published version.
A score is evidence about one system on one version of one scenario. Read the constraints and problem statement before drawing a general conclusion.
Step 4: download or reuse the scenario
The detail header provides JSON and YAML downloads. Use JSON when your program expects structured data; use YAML when a human-readable configuration is easier to review. The download includes the scenario definition, roles, constraints, version, publication metadata, and related evidence.
To reuse the scenario in your own workspace, click Use as Template. Truvyx opens Scenario Studio’s new-scenario flow with the Registry scenario preselected. You can then adapt it for a private experiment while preserving the original Registry version as your reference.
This is the key connection to Scenario Studio: the Registry gives you a known evaluation contract; Studio lets you create a controlled variant.
Step 5: run your system against the benchmark
The Registry does not execute your agent automatically. Open the scenario in Studio, inspect its constraints, and make sure your agent output follows the expected shape. Then use Evaluation Runs or the API to submit a run with the scenario ID, agent system name, and agent output.
The Verifier Factory turns the scenario rules into executable checks. The result is a run status, score, constraint-level evidence, and violations. A passed run can become a leaderboard submission; a failed run is useful diagnostic evidence, not a dead end.
Suppose two agents both claim they resolved an outage. One gives a confident answer without evidence; the other cites the logs, respects the escalation window, and avoids exposing restricted fields. A simple accuracy score might treat them alike. The Registry scenario’s constraints make the difference visible.
Step 6: contribute your own scenario
Go to Contribute a Scenario. The contribution flow has four steps: Select, Checks, Details, and Confirm.
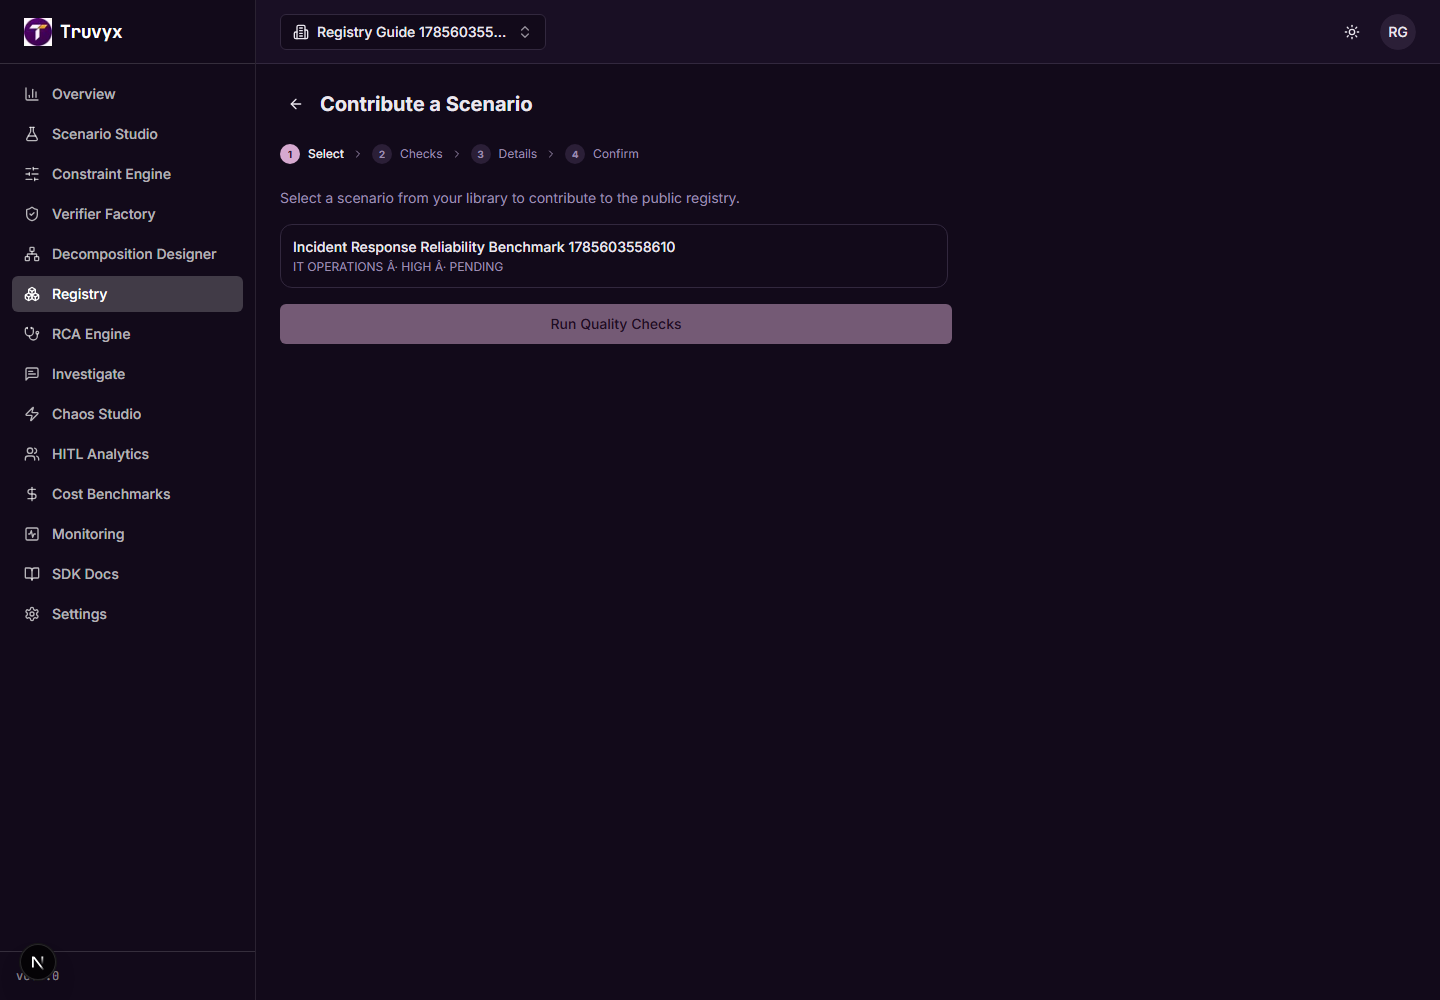
- Select: choose one of your own scenarios. If you have none, create one in Scenario Studio first.
- Checks: Truvyx checks feasibility, at least five constraints, at least two constraint categories, a problem statement, at least two agent roles, and duplicate similarity below 0.85.
- Details: enter a semantic version such as
1.0.0, explain what makes the scenario useful, and add comma-separated tags. - Confirm: submit it for review. Public contributions are reviewed before they appear in the public catalog.
If a check fails, use the link back to the scenario to fix the underlying object. For example, add diverse constraints in the Constraint Engine, generate feasibility evidence, or define the missing agent roles.
Step 7: choose public or private publication deliberately
The publication endpoint records a Registry listing, slug, semantic version, tags, and visibility. Public entries can be discovered, downloaded, cited, and compared by other users. Private entries are useful for internal benchmarks and controlled experiments.
Publishing is not the same as passing every check. The contribution flow records an auto-check result and a status such as Submitted or Auto-check failed. Treat the review state as part of the scenario’s provenance. Do not call a draft a validated public benchmark.
When the scenario changes, update its version and write a change note. A version should represent a meaningful change to the task, rules, agents, or expected output—not a cosmetic edit. Keep the old version available when you need to reproduce a historical run.
How Registry connects to the rest of Truvyx
- Scenario Studio: authors scenarios and creates private variants from Registry entries.
- Constraint Engine: defines the hard and soft rules that make a benchmark meaningful.
- Verifier Factory: compiles those rules into executable checks.
- Evaluation Runs: stores each agent attempt and its evidence.
- Leaderboard: compares verified results across systems.
- Citation and API: makes benchmark provenance portable for research, CI, and external tools.
Think of the Registry as the stable reference point in the workflow. Studio changes the experiment, the Verifier checks it, Runs produce evidence, and the Registry preserves the reusable benchmark and its version history.
A safe first exercise
- Find one high-difficulty scenario in your domain.
- Read its problem statement and every constraint.
- Download the JSON and record its version.
- Clone it into Scenario Studio and inspect the copied rules.
- Run one intentionally good and one intentionally bad agent output.
- Open the run evidence and compare it with the Registry leaderboard.
- Only publish your own scenario after it passes feasibility, diversity, completeness, and duplicate checks.
Continue the workflow
Start with Scenario Studio, then use the Verifier Factory guide to turn the Registry contract into executable evidence.